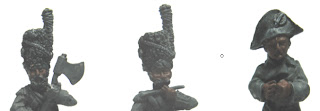
But how to do it? Some people can and do achieve wonderful face effects including eyes etc and I have nothing but admiration for the talent and time committed. My own method is a step down from that , but is simple to achieve a good effect time and again. It works on really crisp sculpts, and ones less so and for larger wargame armies I have created is a good trade off on time/reward. Remember that these are small areas you are talking about so try to paint for effect. They are also generally going to be viewed at a distance of several feet away. (a 28mm figure 1-64th scale for a 6 foot person - you try looking a someone 64 feet away can you see the whites of their eyes? So viewing even further away reduces the minute detail required)
Some basic principles , work from dark to light , inside to out. Areas that are import are Nose, Forehead, Cheeks, Chin, Lips, Ears, Facial hair.
OK time for some pictures . These guys are part of a 28mm vignette piece. they are prepared so far with dark grey undercoat all over ( black is too unforgiving IMHO and makes lighter colours hard work). they also have their headdress main colour completed - in this case black, and dry brushed for later once the face is done - I don't want to go near the face with a larger dry brush once completed in case of causing damage needing re-work. Another part of my philosophy, do it once, do it right re-work is wasted time!
START
STAGE1 - Dark Brown to (This Vallejo FLAT BROWN) all the flesh area, however if you want black, grey facial hair later then leave this uncovered
STAGE2 - Lighter Brown , starting with the nose, across the forehead , cheeks, ears, chin, and lips. Leave a little of the dark brown showing in the deep recess. If the figure has something cast deep in the eye , just flick across that with the light brown ( This is Humbrol 110 - Natural wood - I do also use Vallejo Khaki Grey too , both work well)
STAGE3 - Dark Flesh tone . Vallejo Dark Flesh - thinned slightly with water.. Again work the same area , but covering slightly less area , leave some of the light brown showing. Add some neat un-thnined dark flesh to the main cheek areas, chin, outer ear, if it needs lightening further.
STAGE4 - Light flesh tone . Vallejo Light Flesh - thinned slightly with water. just highlight the key areas, nose top, nostril sides if cast well enough, cheekbones, chin , lip,, centre of forehead.
If no facial hair , your done!
STAGE5 - Facial hair base. Depending on the colour you want , then use dark , then light combination. These are "grumblers" so I went for a Vallejo Light grey and used small strokes to highlight across the moustache, beard and sideburns.
STAGE6 Facial Hair - light. Using the lighter colour, use dabs, dots, or single stroked to highlight the beard, moustache and sideburns as required. - up close it can look a little odd, but move it further way it works.
Now you little people have some soul...time to get the uniform done!
And a distance view - this is taken from about 6 inches away
Colours used:-
Dark Brown - Vallejo Flat Brown 70984 - or Humbrol 170
Light Brown - Vallejo Khaki Grey 70880 - or Humbrol 110 or 83
Dark Flesh - Vallejo 70927
Light Flesh - Vallejo 70928
Facial Hair combo- in case Vallejo - Light Grey 70990 , and Off White 70820
I have used this basic face technique for 6mm, 15,mm, 20mm, 28mm across the years , the basic principle stands up well , you just need fewer colours the smaller the scale. It also works particularly well under a gloss varnish which picks out the light flesh highlight well.
Hope it is of use!
And with uniform


Good stuff,
ReplyDeleteVery helpful as I will be starting to do the odd 28mm Nap soon.
Cheers
Paul